Showing posts with label kitchen. Show all posts

03 July 2011

kitchen: painted

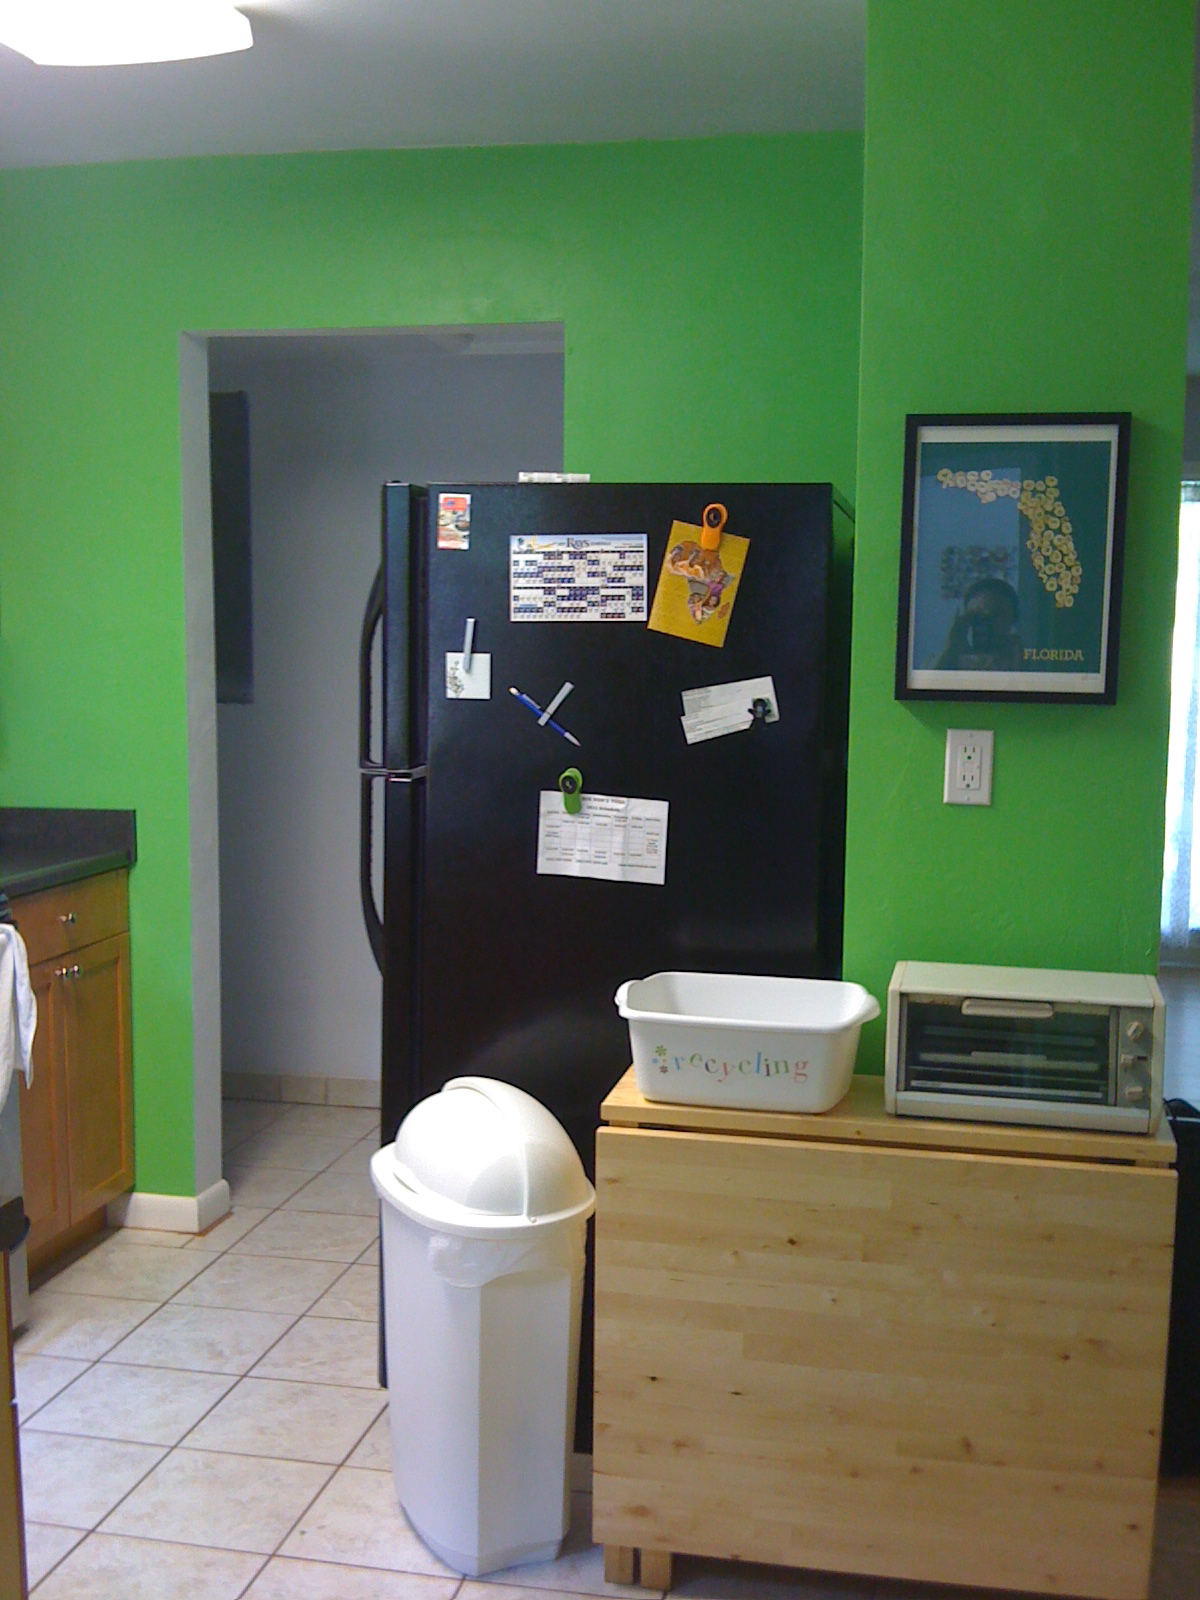
While it took way longer between coats than we would have liked and there is still some trim work to be done, the kitchen is finally painted. And it is bright.


Results have been mixed amongst friends and family. We weren't so sure ourselves, but it's grown on us tremendously. The color is most beautiful in morning with sunshine streaming in from the kitchen window.

On to the Florida room. Yay!

07 July 2009

garden spoils


This is all from the garden (well, the red onions were from the blueberry farmer.) There were 50 ripe tomatoes the last time we harvested, and more on the vines ready to go. We made 2 types of salsa for the party last week and are planning pizza sauce for tonight. I am also kicking around the idea of tomato jam. Tim says it sounds unappetizing, but I think it could be yummy -- for use on bruschetta maybe? We've already done the annual blueberry jam canning, but I'd love another excuse to pull out the canner. Maybe we'll put up some fresh tomato sauce too.

23 June 2009

excuse the dust...

I haven't been here in a while. Well, that's not true. I visit occasionally; usually close to 11pm on a school night exhausted and feeling guilty about not writing. Hmm... let's not think about that since now it's summer and I have plenty of time to do, well, whatever.

While I haven't been busy here, Tim and I have found time for lots of home improvement projects. We've been hard at work on the yard planting veggies, tending citrus, weeding flower beds. We pretty much have things down to a relatively quick daily maintenance. Two sets of hands have made things so much easier. While there are many things we want to do outside, a new grill popped to the top of the list after Tim accidentally shattered the window in our ancient grill while putting out the Great Grill Fire of 2009.


The grill sat lonely and unused for over a month while we went searching for a new one. After 6-7 trips to various stores and countless hours comparing grills online, we finally bought one this past weekend. It took the entire Rays v. Mets game to put together (rain delay included.) It's really quite pretty.


We had my parents over for Father's Day and grilled pork roast, asparagus, and fresh garden tomatoes. The grill performed flawlessly, and Tim is now back to planning dinners outside -- thank goodness. With this horrible heat wave, it seems hot enough to cook outside without the benefit of a grill!


Anyhow, I have lots more projects to share and several ideas in the works for summer sewing. But first up is a refresh of the blog -- if I can figure out how to put up a new banner. Here's to free time!

25 January 2009

juicer overload

Our latest stash from Ward's: Navels, blood red oranges, honey tangelos, honey tangerines, and -- of course -- grapefruit. We have been spending our time holed up in our cold house drinking lots of fresh orange juice. This is one of the few things I can say that was good about the cold weather. Maybe our trees will be big enough to produce some fruit of their own next year.

06 June 2008

step-by-step guide to homemade jam


Making your own jam seems like an antiquated thing your grandmother did. After all, jam is easily found at the grocery or at the farmer's market -- there it's even sure to be homemade (albeit by someone else.) But it's a fun activity to do with all the extra berries you have left over after a trip out to a you-pick farm. Blueberries are easy to preserve since they freeze well. But I've never had any luck freezing strawberries -- they always taste like mush once you thaw them. Jam is a nice alternative.

The hardest decision to make is whether to can your jam or just leave it in the refrigerator. Canned jam has a shelf life of about one year (which is why I can make them now and give them as Christmas gifts), but refrigerator jam should really be used up in a month or so. If you decide to can, you'll need a couple of extra ingredients: a canner (or large stockpot) and canning tongs, which are covered in plastic to grip hot jars securely. I'm not sure where I found my canner, but it was probably at a thrift store for a few dollars. I went ahead and bought the tongs new, along with a wide-mouth funnel for ladling in the hot mixture into the hot jar -- both were very good investments.

I have the easiest jam recipe I can think of. It uses what seems like a lot of sugar, but when you keep in mind that most strawberry recipes use twice as much it's not so bad. This is a combination of several different berry recipes I've tried over the years. I don't like my jam too sweet, so feel free to add more sugar as you see fit.

pen loves paper's All-Purpose Jam Recipe

2 pounds fruit
2 cups sugar
juice of one lemon
6 1/2-pint jars, with screw tops and new lids

Really. That's it. It's what you do with it that makes a difference. First of all, don't bother with a scale. When you're at the you-pick place, ask them to bag your haul in two-pound increments. Extra berries should get their own bag (for nibbling or making mixed-berry jam.)


Add the two pounds of berries to a large glass or ceramic bowl with the sugar and lemon juice. Mix together and let sit on the counter for two hours to macerate, stirring several times. The above photo shows three different batches of jam: strawberry, blueberry and mixed-berry (strawberries, blueberries, and blackberries.) Your strawberries will turn to mush within an hour, the blueberries barely do a thing. This is what the mixed-berries looked like:


If you are canning, place 6-7 newly washed jars into your canner and cover them with water to over an inch above the top of the tallest jar. Put the canner on to boil a half hour to an hour before the berries are done macerating. My canner takes forever to heat up, so I put it on almost immediately after starting the macerating process. If you aren't canning, just add the clean jars to super hot water in the sink about 10 minutes before macerating is over and let them sit until you are ready to use them. Next, add your berry mixture to a saucepan and bring to a boil on medium-high heat, stirring often. Watch it carefully, as it tends to froth and can run over the pan as it reaches a boil. Once it reaches a boil, turn down the heat to low-medium and boil for 18-22 minutes, still stirring. Add the lids (not the rings) and enough water to cover them to a small saucepan and bring to a boil.

What you do next depends on what type of jam you like. I like my jam runny since I use it more on ice cream and in cookie recipes than on bread. If you like thicker jam, you will need to boil it an extra 5-15 minutes. It also depends on the berries you use. Blueberries are done much quicker because they don't give off as much liquid during the macerating process as the strawberries.

How will you know when it's done? There are two schools of thought on this (I personally use them both.) One is to stir the mixture and then run your finger down the back of the spoon. If your finger trail stays, it's thick enough. I use this as a primary measure. Then I try this: place a small saucer in the freezer. Once you think the jam is thick enough, spoon a small amount onto the saucer and place back in the freezer for one minute. Pull it out and push the edge of the jam with your finger. The jam should have formed a coating of sorts and ripple when you push it. If it doesn't ripple, boil it for a few minutes longer and try again.


When your jam is ready, turn the heat to low and pull the jars out of the boiling water one by one and lay them on an old towel you have doubled or tripled over (make sure it's old, you will definitely get stains on the towel.) Ladle the jam into the hot jars using the wide-mouth funnel, filling them up to the screw lines on the jar. It depends on the type of jam you are making to how many jars you will fill. Blueberry and mixed-berry jams made six 1/2 pints each, the strawberry only made five. Use a wet paper towel to wipe the edges of each jar. Using tongs, pull the lids out of the water and shake dry before adding them to the top of the jar. Add a screw top to each.


Use the tongs to add the jars back to the boiling water. Allow jars to boil for 15 minutes. Pull the jars out of the water and place on a towel to cool. Do not be alarmed if you hear a strange ping/popping sound coming from the cooling jars. That is the sound of the jars sealing. Let the jars cool overnight on the towel. Then label them with contents and date. If you aren't canning, add contents and date to the lids and store in the refrigerator. Either way, that wasn't too hard was it?

04 June 2008

a berry busy day

I decided to go out to Santa Fe Berry Farm last Saturday to pick blackberries and blueberries. It's located in tiny Earlton off SR26 right on Lake Santa Fe -- check out the view from their house (they welcome visitors to check out the lake):


I chose to go there instead of my usual organic haunt because I've always wanted to pick blackberries but end up going too late in the season to have any luck. It took a long time to pick the blackberries because of their thorny bushes, and by the time I was ready to switch to blueberries I was already hot and sweaty. Six pounds of blueberries was what I needed to make jam, but I gave up long before that due to the heat -- my fault for going berry picking at 11am. I ended up with almost a pound and a quarter of blackberries and 3 and a half pounds of blueberries (and at least a pound of berries in my tummy!) all for about $10. Not bad for two hour's worth of work.

Another fun thing about Santa Fe Berry Farm is their flowers. They grow huge sunflowers, black-eyed susans and zennias that you can cut to make your own bouquets.


If you decide to go (and I'd highly recommend you do) don't forget to wear close-toed shoes, bring a hat and your water bottle. You may even consider gardening gloves to get to some of those hard-to-reach blackberries without endangering your fingers.

Since I didn't get enough blueberries to make the amount of jam I wanted, I drove over to Roger's Farm to pick several extra pounds of strawberries so I could make mixed berry jam instead. Picking strawberries can hurt your back, but it's certainly quicker than blueberries or blackberries -- and you can't beat the price of $1 a pound! They had dropped the price of pickling cucumbers to 60 cents a pound, so I bought more of those too. If you're going to spend the day canning, you might as well go all the way, right?

23 May 2008

pickles!

I apologize for being MIA lately, but I've been working like crazy -- even at home -- and then Tim was in town for a week and, well, we were so busy I don't think we even really had a chance to relax. We saw UF's amazing series sweep of perennial SEC-dominating Vanderbilt (oh, and UF's win against Tim's eventual PhD alma mater USF), traveled down the Ichetucknee River with friends, celebrated my Dad's 60th birthday, and did a lot of canning. Yes, canning.

I found a great refrigerator pickle recipe several years ago that I used as my entry into the world of preserving veggies and fruits. But since I crave these pickles long after their refrigerator life is over, I decided to try canning them properly this time. If you've ever thought about making your own pickles, I highly recommend trying this recipe -- it's really worth it!


It starts with the cucumbers. You need to use pickling cucumbers that don't have wax on them (that goes for any fruit or veggie you preserve.) We made the annual pilgrimage to Roger's Farm (off of SR 121 on the way to Raiford) to get cucumbers. I use about 2-3 per jar, so I bought 24 cucumbers at 70 cents a pound! (If you're local, you can always get them at Ward's but not nearly as cheap.) I am growing cucumbers in the garden this year, but with the drought and all, they are far from ready. We also picked some strawberries for jam, but more on that in a later post.


I buy about two heads of garlic, since I like to use 3-4 cloves per jar, and a medium dill plant so I can keep making these all summer. You have to cut off the ends of the cucumbers so they'll fit in the jars, and I like to cut them into wedges so they're easier to eat right away.


This recipe makes about 7 pint-sized jars of pickles. The jars are reusable, as are the rings, but the lids must be replaced with every batch. For refrigerator pickles, you can sterilize the jars in hot water in the sink. If you plan on canning them, sterilize them in boiling water in the canner for 10 minutes before laying them on a towel to cool briefly before filling them.

pen loves paper's Garlic Dill Pickles

2 heads of garlic, about 3-4 cloves per jar, broken into cloves and peeled
1 bunch fresh dill, about 4-5 sprigs per jar
21 pickling cucumbers, washed with the ends cut off and sliced lengthwise into spears
2 1/3 cup water
3 2/3 cup white-wine vinegar (look for large bottles at specialty food stores like Fresh Market)
1/3 cup sea salt
2 teasp pickling spices
1 teasp dill seeds
1 teasp whole black peppercorns

Combine the water, vinegar, salt, and other spices in a saucepan. Bring to a boil and boil on high for 3 minutes. Leave to cool. Begin to sterilize the jars.

Pack the cucumbers 2/3 full in each jar. Add the fresh dill sprigs and garlic throughout each jar, then wedge in as many cucumbers as possible until it's full. Don't let the spears go above the lower lip of the jar.

Pour the cooled mixture over the cucumbers to cover by 1/2 inch. Seal the jars and label. Store in the refrigerator for 3 weeks before eating. Use in 2-3 months. Alternatively, seal the jars and process in the canner for 10 minutes. Rest the jars on a towel to cool to room temperature. Label and store in a cool place from 3 weeks to up to one year.

04 May 2008

oh my goodness

Blueberries. In the first week of May. Wow!

These fresh, organic, giant berries were delivered to my doorstep courtesy of my parents, who went picking at South Moon Farm in Cross Creek Saturday morning. These berries are so big and still super tart. Really, I cannot get over the size of these things. I am eating them like candy. We've been going to South Moon for over a decade and they've never been this big before. And it's early for blueberries, even here. It's normally a June crop.

This means I need to step up the kitchen activity now that the season has started -- there are yummy no-bake blueberry pies to whip up, blueberry muffins galore to bake, and jam to cook and can for holiday gifts. You know, I haven't even put up my garlic-dill pickles yet because I thought I had more time. I guess I'd better get started!

22 April 2008

tart and tangy

There are many divisive flavorings in the world of food. The one that comes to my mind the quickest is vinegar -- Balsamic vinegar to be exact. I love the tangy taste Balsamic vinegar brings to a meal. Usually it's used for just a hint of flavoring so it doesn't overwhelm a dish.

But one of my favorite recipes uses it as an integral ingredient. I was craving something tangy today that included pasta, so I knew I had to dig this out. I think the recipe is from a cookbook I checked out of the library years ago. It's been altered a bit since then (the original recipe called for an entire stick of butter!) and now it's close to perfect.


Sauteed Shrimp with Buttery Balsamic Vinegar Sauce

1 lb. large shrimp, peeled and deveined
dash of both salt and pepper
4 tblsp. butter
1/2 cup Balsamic vinegar
2 tblsp. fresh parsley, chopped
2 tblsp. fresh chives, chopped
1/2 tblsp. fresh tarragon, chopped
1 1/2 cups orzo, cooked
lemon wedges for serving

Melt 1 tblsp. butter over med-high heat. (Start cooking the orzo now too in order for everything to finish at once.) Add shrimp and salt and pepper once butter froths. Cook shrimp through, then remove from pan and set aside.

Add remaining butter and melt until browned. Take the pan off of the heat, add the vinegar (it tends to splatter more if you do it while the pan is on the heat) and put back on med-high heat. Scrape up the bits stuck to the bottom of the pan. Cook until sauce thickens to about 1/2 cup, 5-7 minutes. Turn off the heat and add the shrimp and any accumulated juices to the pan. Add chopped fresh herbs. Serve over orzo or combine everything in a large serving bowl.

05 February 2008

fat tuesday food

My community is lucky enough to have a wonderful family-owned grocery. Like most local stores, it serves different niche markets. Ward's is the best place in town to go for fresh, locally grown veggies and plants. Their meat department is amazing -- they cut thick steaks fresh every day and have yummy homemade sausage you can buy by the pound. It's also the best natural foods store in town with an impressive bulk section filled with hard-to-find ingredients. But they also sell pig's feet and other classic southern food fixings. Add in the largest chocolate selection I have ever seen in any grocery store and an impressive beer collection, and what's not to love?

While I enjoy spending time roaming through the aisles looking at all the new products they have on the shelves, the store's smaller size means I can't guarantee that any preferred pantry staple will be there. This means that I swing by the neighboring Publix afterwards to stock up on cheaper staples and favored brands (I know I'm not the only one who does this because I always see at least one person at Publix who I saw at Ward's just minutes earlier.) Since my budget requires me to be an organized shopper, I usually try to plan a week's worth of meals before going grocery shopping but I always leave wiggle room just in case. It's a good thing I do otherwise I never would have come up with tonight's dinner.

Ward's had a great sale on large shrimp for the Super Bowl, so I decided to buy a pound. Limes were also on sale so I threw a couple of those in my basket. Fresh garlic and scallions were on my list already, and as I left Ward's a plan for dinner began to emerge. As you can tell from earlier food posts, most of my creations have a Latin flair. This one is no different. At Publix I bought my favorite canned black beans that already include some spices, as well as some basic white rice and whole-wheat tortillas. This is what I ended up making:


pen loves paper's Garlic-Lime Shrimp with Herbed Black Beans and Rice

1 lb. shrimp, peeled and deveined
Zest of 2 limes (retain limes for juicing)
salt and pepper to taste
5 scallions, chopped
1/4-1/2 teasp. red pepper flakes
4 cloves of garlic, minced
olive oil
1 cup rice, cooked
1 can black beans
1/2 tblsp. cumin
cilantro
parsley
tortillas

Add shrimp, lime zest, 3 cloves minced garlic, 3 chopped scallions, salt and pepper, and red pepper flakes to a non-reactive (glass) dish. Add enough olive oil to coat the shrimp and mix until shrimp is covered. Place in the refrigerator for 30 minutes.

In the meantime, cook the rice according to package directions. Chop up a handful of cilantro and parsley. Add the black beans into a saucepan and set on the stove at low heat. Add half of the cilantro and parsley, the remaining chopped garlic clove, cumin, and one chopped scallion to the black beans. Squeeze in the juice of half of a lime. Stir to combine, then occasionally until warm. Once the rice is cooked, add the remaining cilantro, parsley, and scallion. Squeeze some of the remaining lime juice into the rice. Stir to combine.

Heat a medium skillet over medium heat. Add shrimp mixture to pan and cook 3-4 minutes or until shrimp are cooked through. Layer some rice, beans, and shrimp onto a tortilla. Squeeze some more lime juice over the mixture. Enjoy!


Of course it would be a waste of limes not to make a Cuba Libre to go with dinner:

Shot of your favorite rum
Juice of half a lime
Coke

Add the rum and lime to a glass. Top with Coke. Stir. Add ice to taste. Fiddle with proportions to your liking. I tend to like less alcohol in my drinks, so you may wish to add two shots for a stiffer Cuba Libre.

Happy Fat Tuesday! (If you live in one of the 24 Super Tuesday states I hope you remembered to vote!)

17 January 2008

lemony one-dish dinner

After the last post I realized I haven't shared a recipe lately. I thought I'd share what I made last night which of course was highlighted by my latest food crush, citrus. Looking at the font, I think I clipped this recipe from Real Simple. Of course I changed up a bunch of things. I was afraid it would be too lemony, but roasting the lemons left them with a milder flavor that's positively addictive. I will definitely be doing more experimenting with roasting citrus.


pen loves paper's version of Pan-Roasted Chicken with Lemon-Garlic Green Beans

4 tablespoons olive oil
2 large lemons, 1 thinly sliced, i juiced
5 large garlic cloves, minced
sprinkle of salt
dash of freshly ground pepper
1/2-3/4 lb. trimmed green beans
6-8 small-medium red potatoes, cut into 4-8 small wedges
4 thin-ish boneless chicken breasts, about 1 lb.

Preheat oven to 450 degrees. Coat a large baking dish with cooking spray or olive oil. Arrange lemon slices in a single layer on the bottom of the dish (I had about 12 slices.)

In a large bowl, combine the remaining lemon juice, olive oil, garlic, salt, & pepper. Add the trimmed green beans and toss to coat. Using tongs, remove green beans from bowl and place them in the baking dish on top of the lemon slices. Add the potato wedges to the same olive oil mixture and toss to coat. Use tongs to remove the potatoes and add to the baking dish in a ring along the inside edge on top of the green beans (see picture.) Dip the chicken breasts one at a time into the olive oil mixture to coat, then place in the middle of the baking dish on top of the green beans. Pour any remaining olive oil mixture over the chicken.

Roast uncovered for 35-40 minutes. Check chicken for doneness. Pull out of the oven and allow to sit for 5 minutes. Place one chicken breast on each of four plates and divide potato, green bean, and lemon mixture among them.

16 January 2008

sour obsession


It's winter in the Sunshine State, and while the weather may not give it away, the sunny-colored fruit all over grocery stores and farmer's markets couldn't make it any clearer. Yes, it's citrus season.

It all started with a giant pink grapefruit Tim and I picked up during a visit to the Oldsmar Flea Market in early December. It was the sweetest thing I'd eaten in a long time. Thus started my quest for more deliciously sweet grapefruit closer to home. I tried all the usual haunts: Ward's, the 441 farmer's market, the downtown farmer's market, and favorite roadside stands. Since then I have eaten a lot of grapefruit, but have yet to replicate the flavor of that sweet Oldsmar fruit. Along the way I've been picking up anything that looks interesting: sour oranges for Cuban cooking (mmm... mojo criollo marinade), ugli fruit (think orange, grapefruit,and tangerine hybrid), and honeybells (cross between a tangerine and a grapefruit.)

Now I usually have limes in the house for Cuban cooking and cocktails (Cuba Libre or
Caipirinha, anyone?) Lemons usually come out for summertime tarts and lemonade. But when I visited Leesburg last week one of the antique stores had Ponderosa lemons on the counter for 50 cents. I figured it would taste more like a Meyer lemon, meaning it would be more sweet than tart. But when I sliced it open Sunday night with a mild chicken marinade in mind I was met with a super tart smell! I ended up using half of the giant lemon for a 3-serving pitcher of lemonade while Tim created a yummy lemon-garlic-Cachaça chicken creation for the grill. We indulged in a giant-sized pumelo (aka Chinese grapefruit) too. It had a really thick skin with tough membranes between the wedges of fruit. And lots and lots of seeds -- over 60! Some pieces tasted tart like grapefruit, some were more mild. It was deliciously messy.

I've certainly been having fun in my all-citrus kitchen, but I still have yet to find another perfectly tart grapefruit.

20 December 2007

cookies, cookies, cookies!

Friday night I had my annual cookie exchange party. I hadn't planned on doing one this year until Stephanie convinced me it would be fun. Last year's was nice but a lot of work. This year's really turned out to be a good event. I scheduled it for the weekend most people would be going to holiday parties so that they could bring some cookies along as gifts or potluck items (every little bit helps during the hectic holiday season, right?) I forgot to take pictures of the cookie table before we all started dividing them up, but here it is mid-grab.


Everyone made around 4 dozen cookies so that each of us could get 4 cookies of each kind. My newest idea was to have folks label their cookies and tell people how many to take (several of us had recipes that made 5-6 dozen cookies.) I always want to know the names of the cookies so that I know what I'm taking. Here are the tags. If any of those look good you can check out the recipes here.


I ended up making two kinds of cookies -- Orange-Sable and Lime Sugar -- so that I could collect two batches. My reasoning: By giving both sets of parents cookies this year I'm off the hook for nut rolls (which I love but are time consuming.) It sounded like a good idea at the time -- and Mom came to collect hers the next day -- but I've been stuck in the house with the cookies for Tim's parents for almost a week now. The temptation is going to kill me! I've had to saran wrap the container they're in and seal it with tape (pathetic!) With those measures in place I should be able to control myself until Monday -- I hope. Don't they look delicious?

02 November 2007

empanaditas

Tuesday evening I made one of my favorite yet most time-consuming Cuban dishes, empanaditas. These tasty meat and veggie filled patties are traditionally made using a pie crust type dough. I found a recipe forever ago that used won ton skins baked in the oven to replace the normally fried dough. This made these tasty treats relatively healthy. I've been playing around with the filling ever since. Since these are so time consuming, I recommend wrangling someone to help with the stuffing & sealing. Solo, it took me about an hour and a half to put these in the oven.


pen loves paper's Empanaditas (beef or chicken)

1 cup very finely chopped red potato, skin on
1 cup very finely chopped onion
1 cup beef broth (or chicken broth if you are using chicken)
1/4 teasp salt
1/2 teasp cumin
1/4 teasp allspice (omit if you are using chicken)
1/4 teasp black pepper
1/2 lb boneless sirloin, trimmed and very finely diced (or chicken breast)
3 garlic cloves, finely minced
2 tblsp finely chopped cilantro

1/2 tblsp cornstarch
1/2 tblsp water
about 45 won ton wrappers (found in the veggie area of the grocery)
2 oz. shredded cheddar cheese

Bring first 10 ingredients to a boil in a medium saucepan over medium heat. Reduce heat and simmer 5-7 minutes or until potatoes are done, stirring occasionally. Remove from heat and drain in a colander. Cool.

Preheat oven to 400 degrees. Put a baking sheet in the oven to heat up (this is the key to making these empanaditas crispy.)

Combine cornstarch and water in a small finger bowl with a spoon. Open the won ton wrappers and work with one or two at a time. Leave the rest under a damp kitchen towel so they don't dry out (and they are really tricky to work with if they get brittle so don't skip this step.) Spoon one teaspoon of the drained meat and potato mixture into the middle of each won ton wrapper and top with a pinch of cheese. Moisten two of the edges of the won ton wrapper with the cornstarch mixture. Bring 2 opposite corners together to form a triangle. Pinch the edges together firmly with your fingers (really make sure they are mashed together or you will have filling all over your oven!) Place the filled triangle onto a plate.

Once you have about 18 empanaditas ready, carefully take out the baking sheet and add the empanaditas, leaving space between them. Place them in the oven for about 4-5 minutes (be really careful about this step.) Pull them out, flip them over, and place them back in the oven for another 4 minutes or until they are golden brown. Place baked empanaditas on a plate to cool for 5-10 minutes. Meanwhile, continue making triangles until you have no more filling. Repeat baking step one to two more times. I can usually get 42-45 empanaditas out of this recipe.

22 October 2007

drink your dinner

I made this dinner a while back and photographed it, meaning to add it here. I forgot about the recipe until just the other day. Recently I've been enamoured with food blogs, especially fascinated by the apparent love of cupcakes in the internet world. I saw a recipe for Cuba Libre cupcakes, which happens to be my favorite simple mixed drink (I promise to make those cupcakes one day, if only to find out what Coke, rum, and lime taste like in cupcake form.) It made me wonder about Mojitos, my newest liquid obsession. So I searched for a Mojito chicken recipe. I didn't like some of the ingredients -- minced ginger is not found in a Mojito -- so I played with it a bit. This is what I ended up with.


pen loves paper's Mojito Chicken

1 lb. chicken breasts
2 tblsp. flour
1 teasp. garlic powder
1 teasp. ground ginger
1/2 teasp. salt
1/2 teasp. black pepper

2 tblsp. olive oil
2 cloves garlic, minced
1/8 teasp. crushed red pepper flakes

1/4 cup fresh lime juice
1/4 cup white rum
3 tblsp. sugar
1/8 cup fresh mint leaves

Mix flour, garlic powder, ground ginger, salt, black pepper in shallow baking dish. Pat each chicken breast dry with a paper towel, then coat with the mixture. Heat oil in a medium skillet over medium-high heat. Add chicken and brown on all sides until cooked through, about 8-10 minutes. Transfer to platter and keep warm.

Add garlic and red pepper flakes to skillet until fragrant. Stir in lime juice, rum, and sugar. Boil slightly until reduced, about 5 minutes. Add mint and stir, cooking for 1-2 minutes more. Pour sauce over chicken. Serve with orzo or rice.

16 October 2007

holiday harbinger


Look what came in the mail today! The November (read Thanksgiving) issue of Bon Appetit. Thanksgiving is my favorite holiday. It isn't overtly religious or full of the commercialism so many other holidays have succumbed to. It is just about family and food -- two of my favorite things. Usually my parents host Thanksgiving and I cook 80% of the dishes. I love to spend hours planning the menu with a good balance of the traditional and new. I even have a Thanksgiving planner that contains previous years' menus (with recipes) along with recipe contenders for the current year's list. I put a lot of time into this, obviously. My paternal grandfather was a chef who passed his kitchen adventurousness onto his sons, which encourages unique dishes on the table whenever we gather.

This year the family rented a beach house in St. Augustine to celebrate both Thanksgiving and my grandfather's 90th birthday. My grandmother just passed in August, and this will be the first time my family has gathered since her funeral. I know it will be a bittersweet affair, since my grandmother was a woman who cherished family, food, and faith above all else. Holidays were very important to her, so I'm looking forward to planning this year's feast while helping to continue our family's traditions. I'll share some favorite recipes from Thanksgivings past when we get into the month of November, since I'm sure I'm the only person out there already planning.

07 October 2007

disappointment & dinner

SEC football is something I really love. So much so that I had all three SEC games on today (yes, even that horribly boring Vandy/Auburn game.) All the teams I wanted to win today lost instead. I'll be honest and say I didn't think Florida would win -- or even get that close -- so I spent most of the game finishing cleaning the house while listening to Mick Hubert's play-by-play on the radio. But by the fourth quarter I was hopeful. I mean, we were still up by 10! We'd held them at the goal line! Then they let LSU come back and win. I am so disappointed I can't sleep, which is why I'm posting this in the middle of the night. Sigh.

The real point of this post was to share the dinner I made tonight. I love Cuban food and cook it often. However, most of my favorite dishes require several time-consuming steps that make them impractical for weekday meals. I did a big fall cleaning day today, which was perfect for making vaca frita since I could go back and forth from the two without wasting any time. Vaca frita is basically a crispy beef stir-fry with hints of citrus, garlic, and cumin. It is delicious.


Here is my version of this classic Cuban dish:

Vaca Frita

1 1/2 lb flank steak, cut in half
2 bay leaves
1 teasp salt
1 teasp cumin

juice from 2 limes
juice from 1 lemon
4 garlic cloves, minced
1 teasp cumin
salt & pepper to taste

3 tblsp olive oil
1 small to medium onion, cut in half then thinly sliced
2 tblsp chopped fresh parsley
lime wedges for serving

Place the steak, bay leaves, salt, and cumin in a large saucepan with enough water to cover the meat. Cover and cook over low heat 1 1/2 hours or until meat is tender. Remove the pan from the heat and allow to sit covered for 1-2 hours for meat to cool.

When meat is relatively cool, remove from stock (save stock for another use -- good black bean or soup base.) Shred the beef using your fingers or two forks (it should pull apart easily) and place meat in a large glass or plastic bowl. Add the citrus juices, garlic, cumin and salt & pepper. Mix it well and refrigerate at least 2 hours or overnight (give it a turn every now and again if you think about it.)

Remove the meat from the marinade, or just pour out the excess juices. In a large skillet, heat the olive oil over medium-high heat until warm and cook the meat, stirring often, until starting to fry, about 5-7 minutes. Add the onions and cook for 5 minutes, continuing to stir. When the beef is crispy, take the pan off the heat and add the parsley and juice of several lime wedges. Alternatively, you could add the parsley and a lime wedge to each individual serving. Serve with white rice. Yummy!

02 October 2007

thrift score!

I had a crazy busy weekend full of so many fun things: I witnessed USF beat WVU in Raymond James Stadium, spent a great evening hanging out with one of Tim's old undergrad buddies, got suntanned and blown away exploring Honeymoon Island, and went to an amazing Folk Art festival in St. Pete. But what am I most excited about? The most amazing thrift score in recent memory!

We're bumming around the Salvation Army in Clearwater off US 19, which we'd passed a dozen times but always figured wasn't that great (SAs are so hit or miss nowadays.) We'd been thrifting earlier in the day and I'd found some cute daisy glasses I would have purchased, except that they were $2 -- each! For a used, paint-peeling-off tumbler! I remarked -- for the millionth time -- about how if you really wanted to get rid of something, you'd price it to move. Ever since eBay, thrifts are so pricey. Not everything is worth a ton of money, you know? Anyway, I was impressed with how reasonably priced everything at this SA was. Obviously, this was a thrift that didn't care about the provenience of their merchandise -- I saw Candlewick stemware for 50 cents a glass! There was an unusually great collection of both dining room suites and china sets. If you know me at all, you know I am obsessed with china. I would have 10 sets if I had the room (and I already have three complete sets!) So I was wistfully looking at each classic pattern when I stumbled upon one of the most amazing things I've ever seen -- an entire set of green Blue Heaven!!


Now, I've collected Royal's Blue Heaven china for almost 10 years. I have a built-in Blue Heaven radar: I can actually find the lone Blue Heaven plate at the bottom of a huge stack of mismatched dishes with just a glance. And between thrifts, antique stores, and (heaven forbid) even eBay I've managed to amass 10 place settings and almost every additional piece -- platters, pie plates, coffee pots, even juice glasses. But after all these years I've NEVER seen the pattern in green. The set includes seven almost-complete place settings, a sugar bowl (with lid!) and two great serving bowls. The photo only shows part of the set -- the rest is drying after a good wash. The berry bowls also have an unusual feature -- a cool side handle. I was so excited I was speechless (another first?) Tim hasn't been thrifting with me for that long so he didn't really understand the magnitude of the find. I ended up with over 50 pieces for $29.99 (no tax in Pinellas County?) When we got home I raced to the computer to research my score. Apparently the pattern is called Mojave Green and is relatively rare (not on eBay, not mentioned on Royal's site, listed on Replacements Limited but with no pieces in stock, etc.) It made me smile all night, even through the Gators' ridiculous loss to Auburn. Now that's powerful!

In blog news, I'm working on getting my Flickr site updated, which means I'll be able to share more fun photos. I'm also trying to figure out how to customize my heading. Hopefully by the time October is over everything will be set up the way I want it. Stay tuned...

22 September 2007

simple pleasures


Life is good. Chocolate pudding (with the skin!) is better. I'm spending the evening hemming new gray pants and watching SEC football -- go Georgia! If I get really ambitious I may start that freezer-paper stencil T-shirt I've been dying to try out. There are probably better ways to spend the last night of summer, but as of right now I'm hard pressed to think of any.